USM Secure Setting
WINDOWS 7
1) Go to
-> Start Menu -> Control Panel -> Network and Sharing Center
2) Choose Set Up a New Connection or Network
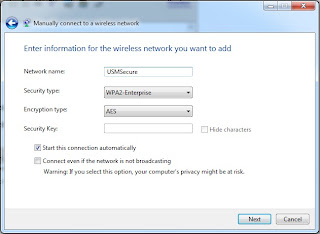
-> Choose Manually connect to a wireless network
-> Next, fill in

-> Click Next
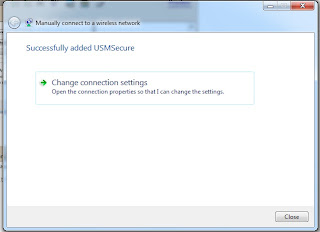
3) When the new network successfully added,this option appear, choose it

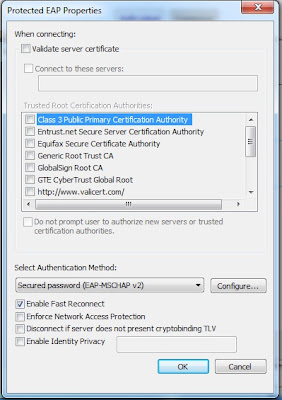
4) Follow below configuration as shown in the picture
(Basically, no changes in Connection and Security Tab)


5) On the Security Tab, Click Setting
-> Untick Validate Server Certificate

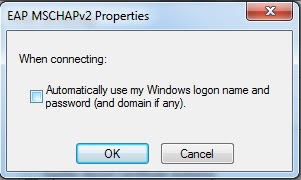
-> Click Configure
-> Untick Automatically use my Windows logon

6) Click OK to all. :)
**For How to setup USMSecure in your MS Windows XP refer to this blog -> S.H.A.Z.M.I.L
**For How to setup USMSecure in your Android Device refer to this blog -> me <> you
-> Next, fill in

-> Click Next
3) When the new network successfully added,this option appear, choose it

4) Follow below configuration as shown in the picture
(Basically, no changes in Connection and Security Tab)


5) On the Security Tab, Click Setting
-> Untick Validate Server Certificate

-> Click Configure
-> Untick Automatically use my Windows logon

6) Click OK to all. :)
USMSecure
Username : Student Emel
Password : no ic
**For How to setup USMSecure in your MS Windows XP refer to this blog -> S.H.A.Z.M.I.L
**For How to setup USMSecure in your Android Device refer to this blog -> me <> you
2 comments:
Tq so much 😀
Tq! tq! tq! 😘👍
Post a Comment